The program starts by displaying the following screen:
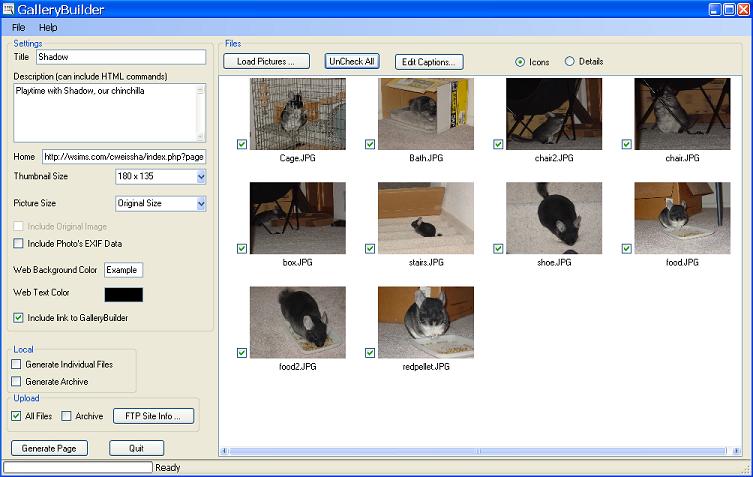
How to make a photo gallery:
- Load images. Click the "Load Pictures..." button.
Select all the image files you want to load and hit ok.
The images will be added to the image list.
- Add Captions (if the images don't already have them). Click "Edit Captions..."
Type a captions for each image. Click Done.
- Enter a title and description for your web page. Both title and description
can have HTML codes.
- If you want a link back to your main page, enter the address in the "Home" field
- Decide how big you want your thumbnails.
All the thumbnails are displayed to the left of the selected image.
You can also select "No Thumbs".
- Decide how big you want the images. You can select original size to not do
scale the images.
- If you have chosen to scale the images, you can include the original
pictures. The displayed picture will then be clickable to bring up the full-size
image
- Decide whether to include the photo's EXIF data. This is information that
your camera recorded with the image and often includes the camera settings. If
this box is checked, a link will be created under the picture that will bring
up a table of the EXIF data.
- Pick a background and foreground color for the web pages
- Enter information about your FTP/WEB site so that the gallery can be
uploaded, or just generate the web pages locally and use your favorite FTP
software.
- Chose to generate individual files or a single ZIP archive.
- Hit "Generate Page" to create your gallery.
The program will prompt for you to save your setup.